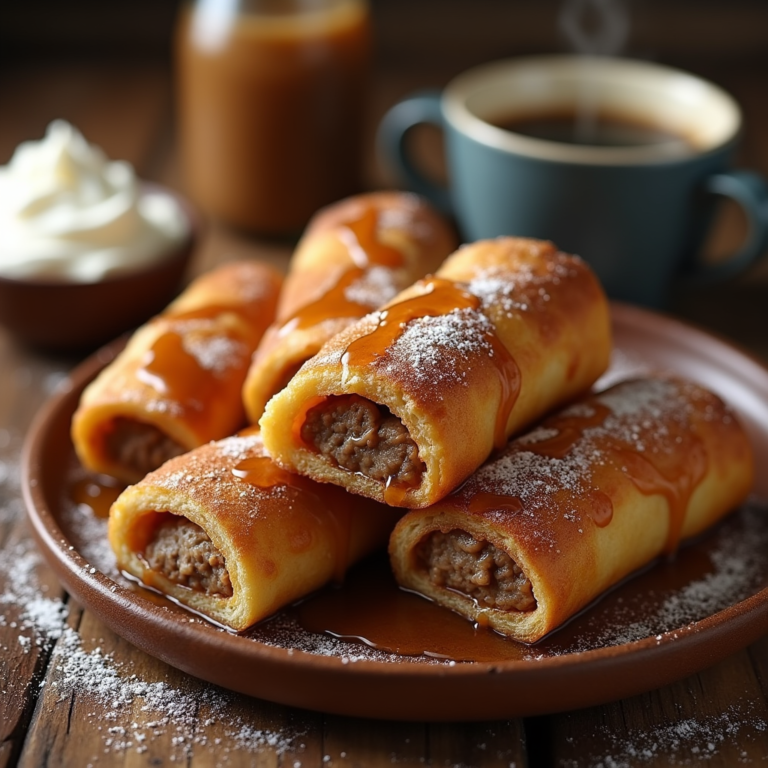
Overnight Crème Brûlée French Toast
If you’re searching for the ultimate brunch showstopper, look no further than Overnight Crème Brûlée French Toast. This recipe combines the luxurious caramelized top of classic crème brûlée with the custardy goodness of traditional French toast, all wrapped up in a convenient make-ahead dish that practically guarantees a standing ovation at your breakfast table.
Perfect for holiday mornings, special occasions, or even a lazy Sunday brunch, this recipe is designed for anyone who wants to impress without the morning scramble. Rich, golden, and meltingly tender, every bite offers the perfect balance of crispy caramel and soft custard. Let’s dive into how you can bring this magic to your kitchen.
Ingredients You’ll Need
For the Caramel Base:
-
½ cup unsalted butter
-
1 cup brown sugar
-
2 tablespoons light corn syrup (helps prevent crystallization)
For the Custard Soak:
-
5 large eggs
-
1 ½ cups half-and-half (or a mix of whole milk and heavy cream)
-
1 teaspoon vanilla extract
-
½ teaspoon ground cinnamon
-
¼ teaspoon salt
For the Bread:
-
1 loaf brioche or challah, cut into thick 1-inch slices
For the Crème Brûlée Topping:
-
¼ cup granulated sugar (for caramelizing)
Optional Garnishes:
-
Maple syrup
-
Fresh berries
-
Powdered sugar
-
Whipped cream
Kitchen Equipment Needed
-
9×13-inch baking dish
-
Small saucepan
-
Large mixing bowl
-
Whisk
-
Offset spatula
-
Plastic wrap
-
Kitchen torch (or oven broiler)
-
Sharp knife for slicing
-
Serving utensils
Step-by-Step Instructions
Step 1: Prepare the Caramel Base
In a small saucepan over medium heat, melt the unsalted butter. Stir in the brown sugar and corn syrup, and continue stirring until smooth and bubbling. Pour the caramel into your greased baking dish, using an offset spatula to spread it evenly.
Tip: Don’t walk away during this step—caramel can burn quickly!
Step 2: Arrange the Bread
Place the slices of brioche or challah over the caramel layer. Slight overlapping is fine but try to keep it mostly in a single layer to ensure even soaking.
Step 3: Make the Custard Mixture
In a large bowl, whisk together the eggs, half-and-half, vanilla, cinnamon, and salt. Pour this luscious custard evenly over the bread slices, pressing down gently to help them soak up the mixture.
Shortcut: You can gently poke the bread with a fork to help it absorb the custard faster.
Step 4: Refrigerate Overnight
Cover the baking dish tightly with plastic wrap and refrigerate for at least 8 hours. Overnight is best—this step ensures that every bite will be perfectly saturated with custardy goodness.
Step 5: Bake the French Toast
The next morning, preheat your oven to 350°F (175°C). Allow the dish to sit at room temperature for 10–15 minutes before baking. Bake uncovered for 35–40 minutes until the top is golden and the custard is fully set.
Step 6: Create the Crème Brûlée Topping
Let the French toast cool for about 5 minutes. Sprinkle the granulated sugar evenly across the top, then use a kitchen torch to caramelize the sugar until golden and crisp. No torch? No problem! Simply place the dish under your oven’s broiler for 2–3 minutes, watching carefully to prevent burning.
Note: Using a torch gives you more control and a beautifully even crust.
Step 7: Serve and Enjoy
Slice, serve warm, and garnish with maple syrup, berries, powdered sugar, or whipped cream for a showstopping finish.
Tips and Variations
-
Bread Choices: Brioche and challah are ideal for their richness, but French bread or even croissants make excellent alternatives.
-
Make it Dairy-Free: Substitute the half-and-half with almond milk and use plant-based butter.
-
Add a Flavor Twist: A sprinkle of orange zest or a splash of Grand Marnier in the custard adds a bright, sophisticated note.
-
Spice It Up: Try adding nutmeg or cardamom for a more aromatic flavor profile.
Storing Leftovers
If you somehow end up with leftovers (unlikely, but possible), store them in an airtight container in the refrigerator for up to 3 days. Reheat in the oven at 300°F (150°C) until warmed through, or microwave individual portions. The caramelized topping may lose a bit of its crispness, but the flavor will still be incredible.
Freezing Tip: You can freeze baked French toast (without the brûlée topping) for up to 2 months. Thaw overnight in the fridge and reheat before serving.
Food and Drink Pairings
Pair your Overnight Crème Brûlée French Toast with a cup of rich, dark coffee or a frothy cappuccino for a luxurious brunch experience. If you prefer tea, a fragrant Earl Grey complements the sweet and custardy notes beautifully.
For a special brunch gathering, a mimosa or a glass of chilled Prosecco adds just the right amount of festive sparkle.
Frequently Asked Questions
Can I make this without refrigerating overnight?
While you can let it soak for just 2–3 hours in a pinch, overnight soaking yields the best texture and flavor.
Do I have to use a kitchen torch?
No, you can use your oven’s broiler. Just keep a close eye to prevent burning. A torch, however, gives a more even caramelization.
What’s the best bread to use?
Brioche or challah is highly recommended because of their tender crumb and slight sweetness. However, French bread or even croissants can be used if that’s what you have on hand.
Can I make this gluten-free?
Absolutely! Just swap in your favorite gluten-free brioche or soft sandwich bread.
How do I know when it’s baked perfectly?
The center should be set but still slightly soft, and the top should be golden brown. A knife inserted in the middle should come out mostly clean.
Final Thoughts
This Overnight Crème Brûlée French Toast is everything you dream of in a brunch recipe: make-ahead convenience, rich flavor, irresistible texture, and show-stopping presentation. Whether you’re celebrating a holiday, hosting brunch, or just want to treat yourself and your loved ones to something extraordinary, this recipe fits the bill beautifully.
If you try this recipe, please share it with your friends and family! Don’t forget to subscribe to the blog for more delicious recipes, tips, and kitchen inspiration delivered right to your inbox. Happy cooking and even happier eating!